Manage user sessions
You can use Nerdio Manager to manage active and disconnected user sessions within the selected workspace.
-
RBAC permissions are required to manage user sessions. See Role-based access control (RBAC) in Nerdio Manager for details. In addition, the user needs permission for RDP.
-
The host pool must be enabled to allow selected non-admin users or groups to shadow sessions. See Host pool VM deployment for details. In addition, you also need network connectivity to the desktop.
Note: You can also select multiple user sessions and perform actions on those user sessions in bulk.
When using new UI, see New UI: Manage user sessions.
To manage user sessions:
-
Navigate to Workspaces.
-
From the list of workspace(s) displayed, select the desired workspace.
-
Select User sessions.
-
The User sessions window opens. It displays all the active or disconnected user sessions across the host pools in this workspace.
-
Use the Search feature to search for:
-
Username.
-
Host name.
-
-
Use the Filter feature to filter by:
-
Show active user sessions.
-
Show disconnected user sessions.
-
Selected host pool.
-
-
To download user session information as a CSV file, select the
 icon from the user sessions bar at the top.
 -
You can select and perform these actions with the users:
-
Send message: Send a message to the user session.
-
Disconnect: Disconnect the user session.
-
Log off: Sign out the user session.
-
Shadow session: Shadow (remote access) the session and provide on-screen support.
-
Log off and flush: Log off and archive or delete user profiles in order to troubleshoot user issues.
-
New UI: Manage user sessions
When using classic UI, see Manage user sessions.
To manage user sessions:
-
Navigate to Workspaces.
-
From the list of workspace(s) displayed, select the desired workspace.
-
Select User sessions.
-
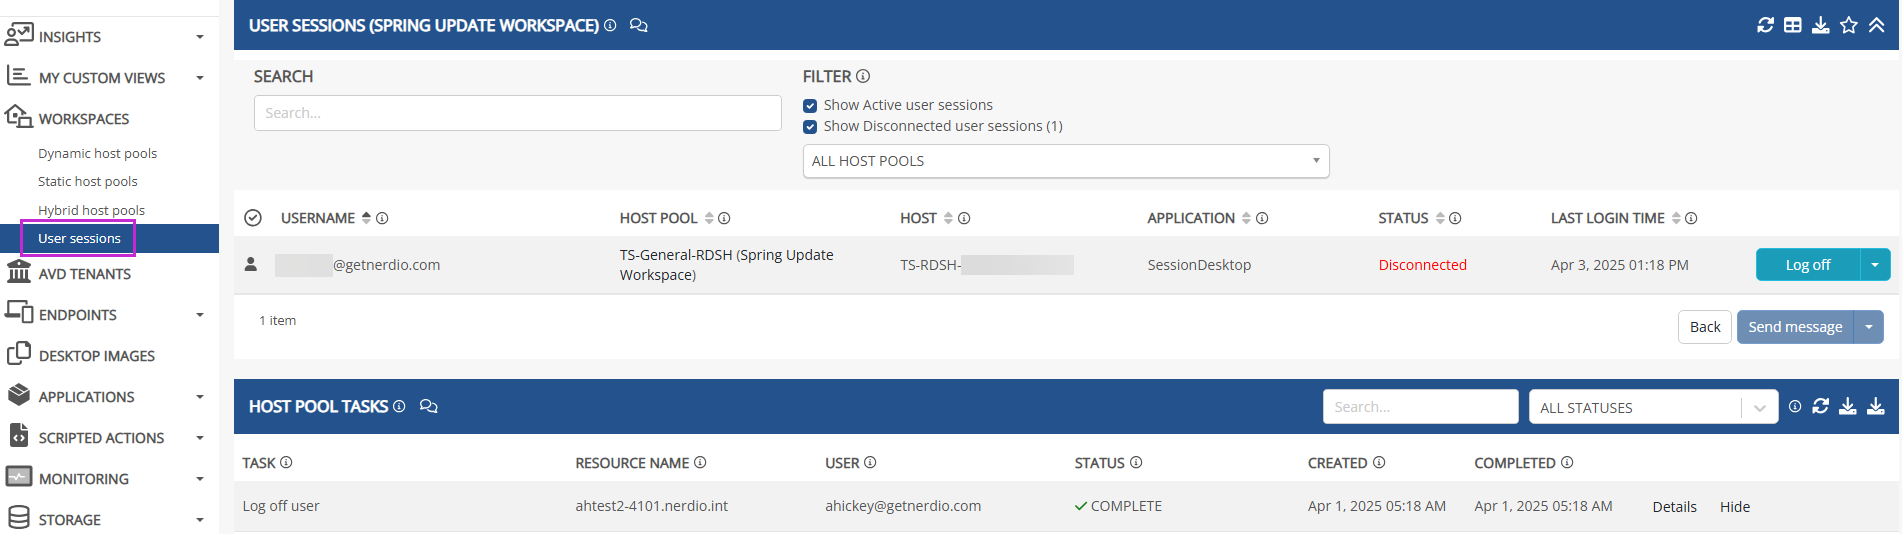
The User sessions window opens. It displays all the active or disconnected user sessions across the host pools in this workspace.

-
Select Search to open the search feature to search for:
-
Username.
-
Host name.
-
-
Select Columns to enable column visibility for application and last login time information.
-
Select Refresh to update the information displayed.
-
Select Export as CSV to download a CSV file containing user session information.
-
Use the Filter feature to filter by:
-
Show active user sessions.
-
Show disconnected user sessions.
-
Selected host pool.
-
-
You can select and perform these actions with the users by selecting the corresponding button or the more options
 menu:
menu:-
Send message: Send a message to the user session.
-
Disconnect: Disconnect the user session.
-
Log off: Sign out the user session.
-
Shadow session: Shadow (remote access) the session and provide on-screen support.
-
Log off and flush: Log off and archive or delete user profiles in order to troubleshoot user issues.
-
Reset FSLogix user profile
Consider resetting the FSLogix user profile to resolve or troubleshoot any profile-related issues.
Note:
-
Resetting the FSLogix profile signs the user out and deletes their profile.
-
You need admin permissions to reset the FSLogix user profile.
To reset an FSLogix user profile:
-
Navigate to Workspaces and select the desired workspace.
-
Go to User sessions and locate the user whose profile you wish to reset.
-
From the Shadow session action menu, select Reset FSLogix Profile.
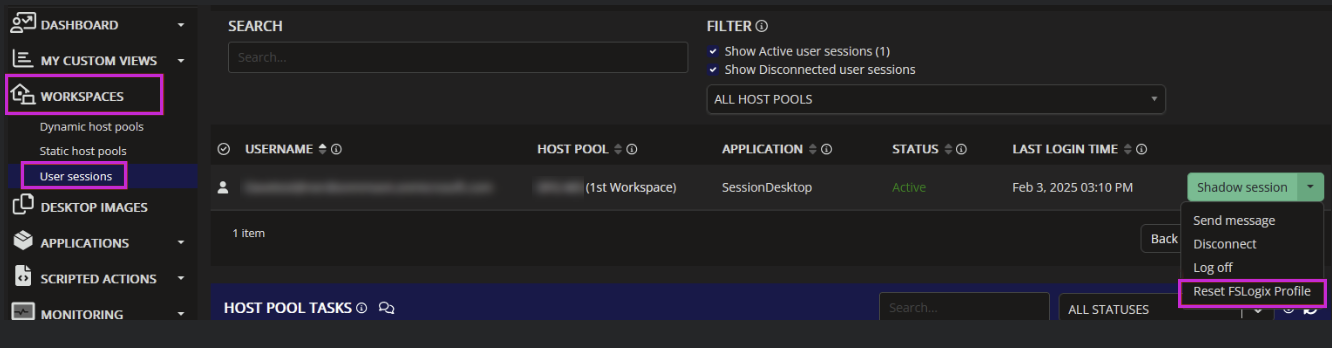
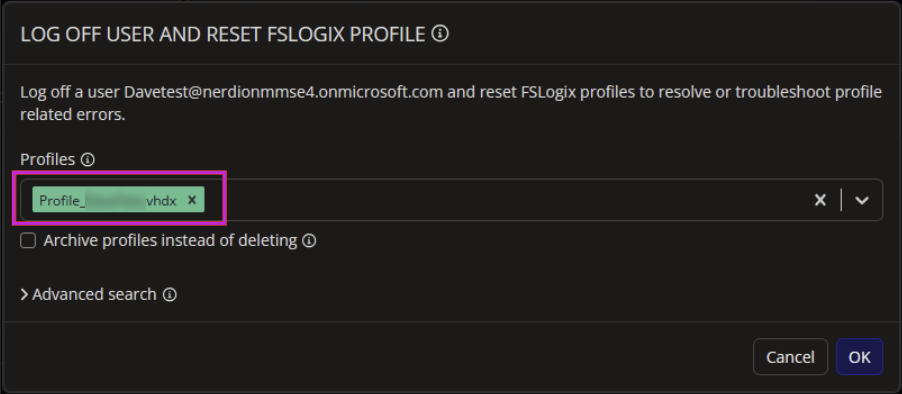
The Log off user and reset FSLogix profile dialog box opens.
-
Under Profiles, from the drop-down list, select the profile that you wish to reset.
-
Select OK.